Testing is important part of the release management process. Having Unit tests is great advantage for your app from many aspects. From keeping code like documentation to easily detecting possible bugs after code changes.
Great thing is that Azure DevOps has a build in feature to track these statistics. In this Post I will show you how to create a pipeline in Azure DevOps that will run your Unit tests and checks it’s coverage.
Pre-requirements
One of the biggest advantages creating Xamarin.Forms app is that business logic can be separated from the View. That makes the app easy testable. That kind of code is usually found in your View Models, Services, Repositories.
- Unit test project written in Visual Studio that is testing your business logic (e.g. ViewModels)
Source code used for this Post: https://github.com/PopovskaS/UITestingDemo
Set up
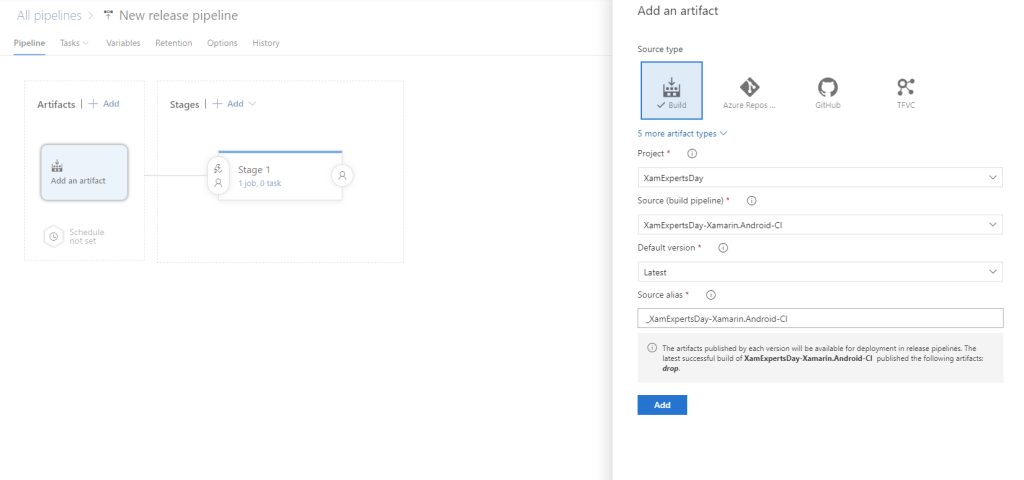
Navigate to your project in your organization on Azure DevOps and from pipeline choose New Pipeline, to create new pipeline. We are going to use the Classic Editor instead the YAML, so select Use the classic editor. Next thing is to select the source where our project is hosted and the default branch for manual and scheduled builds. Once that is done click on continue. From the templates search and choose Empty pipeline.
Once you find the Empty pipeline click on it and apply.
Build Unit tests
By having this section you will be provided with the Unit Tests statistics that will be shown as a separate tab at the top of your successful build (after pipeline run).

First set up a representative name for your pipeline. Once that is done select Pipeline.
- Add name for the pipeline in Name field.
- Set the machine that will build and execute your tests. You can choose Hosted > Azure Pipelines and you will be given a capable machine that can do that for you. Use Private > The name of your pool, to choose capable agent from your private pool of agents. It is really important that Coverage works with .NET Framework on Windows and .NET Core on all supported platforms, so whether it is Hosted or private choose a capable agent according to your project Target framework.
- Select Get sources and in Clean choose True from the dropdown
Nuget tasks
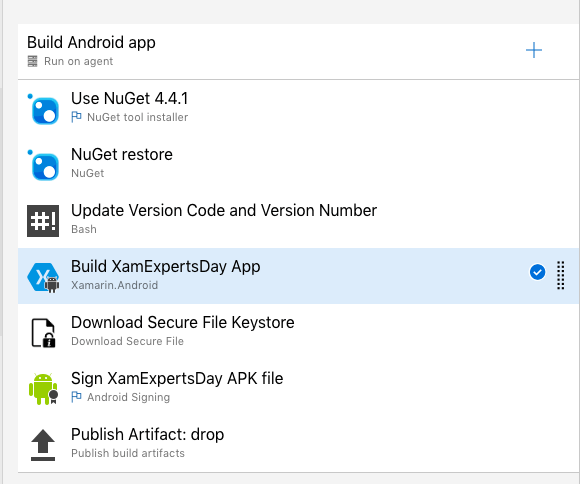
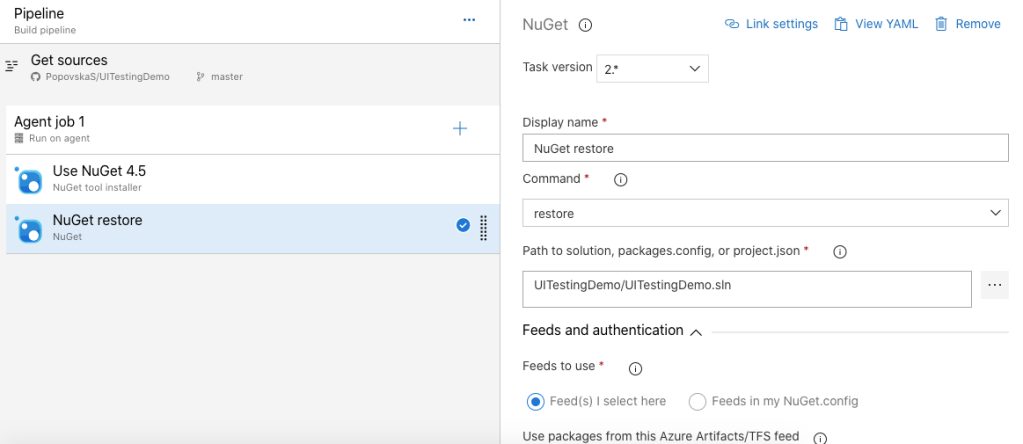
First thing to do is to add the Nuget tasks used to restore the Nuget packages for our project. Click on the plus icon near Agent job and select NuGet tool installer and then add NuGet to restore the nugets.
- In the NuGet tool installer you can select the version of the installer.
- In the NuGet task click on the three dots icon and select the .sln file to restore the nugets for your solution

Test execution
Search from tasks .NET Core you can use this task to build and tests your .Net Core projects.
- In Display name add representative name for your Task e.g. Execute Tests from UI Test Project
- In Command select test
- For Path to project select the path to your project if you have multiple projects with unit tests add them all by separating them with space. Start with $(Build.SourcesDirectory) and locate the project/s e.g. $(Build.SourcesDirectory)/UITestingDemo/DemoUnitTests/DemoUnitTests.csproj
- In Arguments we will choose the configuration in which we want the tests to be build. In this case Release: –configuration Release. Note that if you want to use this configuration throughout your whole pipeline define a variable with e.g. name BuildConfiguration and value Release and switch your arguments to –configuration $(BuildConfiguration).

Having this set up we can determine now form the pipeline the status for our Tests. In example, how many Passed, Failed etc… But further more to strengthen the stability of our project we can determine how much each of our files are covered with the tests.
Code Coverage
For the code coverage we are going to use Coverlet.

Pre-setup
Add coverlet.collector and coverlet.msbuild packages to your Unit tests project
How It Works
The following explanation is taken from documentation. For how Coverlet Coverage works you can go through whole documentation and apply the things that meet your needs: https://github.com/coverlet-coverage/coverlet
Coverlet generates code coverage information by going through the following process:
Before Tests Run
- Locates the unit test assembly and selects all the referenced assemblies that have PDBs.
- Instruments the selected assemblies by inserting code to record sequence point hits to a temporary file.
After Tests Run
- Restore the original non-instrumented assembly files.
- Read the recorded hits information from the temporary file.
- Generate the coverage result from the hits information and write it to a file.
Update Test execution task
Since now we are familiar that coverlet generates coverage file we can update our task with some more changes.
- Update Arguments with –collect:”XPlat Code Coverage” – to get coverage
- Since we want to test the code coverage only for specific files- where our business logic, is and ignore the extra files detected by coverlet we are also going to set this extra argument –settings ./UITestingDemo/test.runsettings, Create .runsettings file in your project. For the advanced options check the list of options that are supported by coverlet.
- Check Publish test results and code coverage
<?xml version="1.0" encoding="utf-8" ?>
<RunSettings>
  <DataCollectionRunSettings>
    <DataCollectors>
      <DataCollector friendlyName="XPlat code coverage">
        <Configuration>
          <Format>json,cobertura,lcov,teamcity,opencover</Format>
          <Exclude>[Xamarin.Forms.Core]*</Exclude>
          <ExcludeByFile>
            **/Xamarin.Forms.Core/*.cs, **/UITestingDemo/*, **/obj/**/*</ExcludeByFile>
          <IncludeDirectory>**/UITestingDemo/ViewModels/*.cs</IncludeDirectory>
        </Configuration>
      </DataCollector>
    </DataCollectors>
  </DataCollectionRunSettings>
</RunSettings>
In example, in my test.runsettings I excluded the Xamarin.Forms.Core files and all other files in my projects except the ViewModels since my Unit tests cover only the View Models.
By adding these changes in the Temporary Directory few attachments will be added. From those files we are going to use **/coverage.cobertura.xml, this summary file is containing code coverage statistics.

Publish code coverage
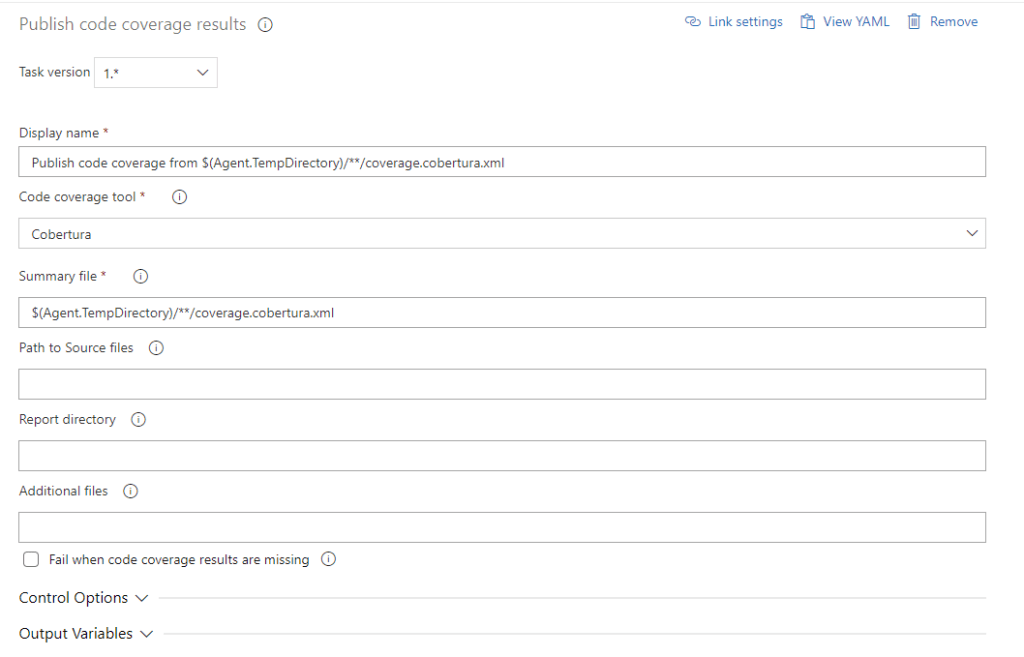
Lets publish our statists from Temporary directory to Azure DevOps. Search for Publish code coverage results task.
- In Display name add representative name for your task
- In Code coverage tool choose the tool from which code coverage results are generated.. In this case Cobertura
- In Summary file detect the **/coverage.cobertura.xml from the temporary directory. If it is the only file in that folder with that signature you can use $(Agent.TempDirectory)/**/coverage.cobertura.xml
By setting all this we are ready to run our pipeline.

Save & Queue.